summoner-sdk
Official builder for the Summoner SDK (multi-repo merge + uv/pip install)
In the AI payments ecosystem
summoner-sdk is an early-stage PowerShell project in the AI payments / x402 ecosystem, focused on agent-to-agent, rust-server. It currently has 2 GitHub stars and 0 forks, and sits alongside related tools like a2a-go, swival, local-operator.
Summoner SDK Build & Dev Script
This repository provides a GitHub template that includes build_sdk.sh, a one-stop script for managing your Summoner SDK development from cloning the core repo and merging native modules to running smoke tests. Below is an overview of each command, its expected behavior, and example usage.
Prerequisites
- Bash shell (Linux/macOS)
git,python3in yourPATH- A
build.txtfile listing your native-module repo URLs (one per line) - Optionally a
test_build.txt(for quick self-tests against the extension template) - (Optional)
uvif you want to use--uv(Linux/macOS only)
[!NOTE] By convention, this template does not support Rust installation on Windows. For Windows users, use the PowerShell script
build_sdk_on_windows.ps1(see below).The
--uv,--server, and--venvoptions are only supported forbuild_sdk.shon Linux/macOS workflows. On Windows,build_sdk_on_windows.ps1always usesvenv/and does not provide Rust server selection (so no--serverequivalent).
Getting Started
To create your own project using this template:
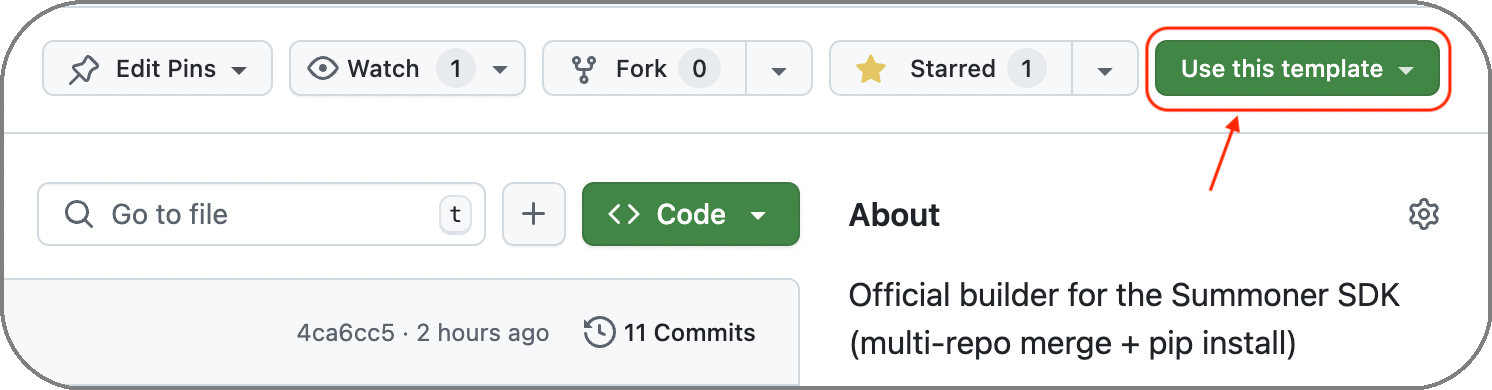
- Click the “Use this template” button at the top of the GitHub repository page.
- Select “Create a new repository”.
- Name your project and click “Create repository from template”.
This will generate a new repository under your GitHub account with the template contents.
Clone your new repository and navigate into it:
git clone https://github.com/<your_account>/<your_repo>.git
cd <your_repo>
Next, define your SDK composition by editing the build.txt file, which lists the native modules to include in your build. Then run the build_sdk.sh script:
source build_sdk.sh setup
You're now ready to begin development.
Windows Users (PowerShell)
If you are on Windows, use the PowerShell script:
# You may need to allow scripts to run for this session:
Set-ExecutionPolicy -Scope Process -ExecutionPolicy Bypass

# Then run:
.\build_sdk_on_windows.ps1 setup
The script exposes similar commands to the Bash script (see subsequent sections for behavior):
.\build_sdk_on_windows.ps1 setup test_build
.\build_sdk_on_windows.ps1 deps
.\build_sdk_on_windows.ps1 test_server

# Optional: activate the repo venv in THIS PowerShell session
. .\build_sdk_on_windows.ps1 use_venv
[!NOTE] The Windows script always uses
venv/and does not support Rust server selection (so no--venvor--serverequivalent).
How to Run build_sdk.sh
You can invoke build_sdk.sh in two ways:
Execute (runs in a subshell)
# Without +x
bash build_sdk.sh <command> [variant] [--uv] [--server <version>] [--venv <path>]

# With +x
chmod +x build_sdk.sh
./build_sdk.sh <command> [variant] [--uv] [--server <version>] [--venv <path>]
After executing
build_sdk.sh setup, the script will have created and populated the virtual environment, but you'll need to activate it manually:source venv/bin/activateIf you used
--venv <path>, activate that path instead:source <path>/bin/activateSource (runs in your current shell)
source build_sdk.sh <command> [variant] [--uv] [--server <version>] [--venv <path>]When sourced, the script activates the virtual environment automatically. Your shell remains in the environment, ready to use the
summonerSDK immediately.
Options:
--uvis optional. When provided,build_sdk.shwill create the venv usinguv venvand install Python dependencies usinguv pip ...instead ofpip .... If you do not pass--uv, the script usespython -m venvandpip(default behavior). (Linux/macOS only)--server <version>is optional. It selects which Rust server prefix to install viareinstall_python_sdk.sh. For example,--server v1_1_0will installrust_server_v1_1_0. If omitted, the default isv1_0_0(so it installsrust_server_v1_0_0). (Linux/macOS only)--venv <path>is optional. It selects where the virtual environment lives. Default isvenv/in the repository root. This is useful when you want.venv/(or any other name) or when integrating into a parent repo. If you use--venv, you should reuse the same value forsetup,deps,reset, anddeleteso the scripts operate on the same environment and cleanup does what you expect. (Linux/macOS only)
Available Commands
| Command | Variant | Description |
|---|---|---|
setup |
(optional) build (default) / test_build |
Clone Summoner Core, merge your native modules (from build.txt or test_build.txt), create & activate a virtual environment, and run Rust/Python extras. |
delete |
— | Remove summoner-sdk/, the virtual environment, native_build/, and any generated test_server* files. |
reset |
— | Equivalent to running delete followed by setup (fresh clone + install). |
deps |
— | Reinstall Rust & Python dependencies in the existing virtual environment by rerunning reinstall_python_sdk.sh. |
test_server |
— | Launch a small demo server against the SDK in the active environment, calling your package's hello_summoner(). |
clean |
— | Remove only build artifacts in native_build/ and any test_*.py, test_*.json, or test_*.log files (preserves the virtual environment). |
[!NOTE] All commands accept an optional
--uvflag (Linux/macOS only). Default ispip. You can also optionally select the Rust server prefix with--server <version>(defaultv1_0_0) and the venv location with--venv <path>(defaultvenv/). These options are not supported by the Windows PowerShell script.
Usage Examples
[!TIP] For development workflows, using
sourceis recommended so your shell remains in the activated environment.
# Use source to stay in the venv automatically
source build_sdk.sh setup

# If using execution instead
bash build_sdk.sh setup
# Then activate manually:
source venv/bin/activate

# Custom venv + uv + choose Rust server prefix (creates/uses .venv/, installs via uv, and reinstalls rust_server_v1_1_0*)
source build_sdk.sh setup --uv --server v1_1_0 --venv .venv

# Setup using test_build.txt + uv + custom venv + specific Rust server prefix
source build_sdk.sh setup test_build --uv --server v1_1_0 --venv .venv

# If you used --venv during setup, reuse it for deps/reset/delete
source build_sdk.sh deps --venv .venv
source build_sdk.sh reset --venv .venv
source build_sdk.sh delete --venv .venv
Command Details & Examples
setup [build|test_build]
What it does
Clones
https://github.com/Summoner-Network/summoner-core.gitintosummoner-sdk/.Reads either
build.txt(for your real native modules) ortest_build.txt(for a quickextension-templatesmoke test), and clones each listed repo intonative_build/.Copies every
tooling/<pkg>/folder intosummoner-sdk/summoner/<pkg>/, rewriting imports (tooling.pkg→pkg).Creates a Python virtualenv (if missing).
- Default:
python3 -m venv venv/ - With
--venv <path>: uses that path instead (e.g..venv/) - With
--uv:uv venv ...(Linux/macOS only)
- Default:
Activates the venv, installs build tools (
setuptools,wheel,maturin).- Default:
pip install ... - With
--uv:uv pip install ...
- Default:
Writes a
.envfile undersummoner-sdk/.Runs
summoner-sdk/reinstall_python_sdk.sh rust_server_v1_0_0to pull in any Rust/Python extras (this also installs the merged SDK).- With
--uv, the script forwards--uvtoreinstall_python_sdk.shso Python operations useuv pipas well. - With
--server <version>, it instead runssummoner-sdk/reinstall_python_sdk.sh rust_server_<version>. For example--server v1_1_0runs... rust_server_v1_1_0. If omitted, it defaults tov1_0_0. - With
--venv <path>, the script forwards--venv <path>toreinstall_python_sdk.sh(and to Rust reinstall), ensuring both Python and Rust installs go into the same environment.
- With
Usage
# Default (uses build.txt, pip, server=v1_0_0, venv=venv/)
source build_sdk.sh setup

# Use .venv instead of venv
source build_sdk.sh setup --venv .venv

# Same, but use uv (Linux/macOS only)
source build_sdk.sh setup --uv

# With uv + .venv
source build_sdk.sh setup --uv --venv .venv

# Select a Rust server prefix
source build_sdk.sh setup --server v1_1_0

# Combine uv + server prefix + venv path
source build_sdk.sh setup --uv --server v1_1_0 --venv .venv

# Explicitly use build.txt
source build_sdk.sh setup build

# Use test_build.txt for a quick demo against the extension template
source build_sdk.sh setup test_build

# With uv + test_build
source build_sdk.sh setup test_build --uv
If you use bash instead of source, make sure you activate the chosen venv (venv/ by default, or your --venv <path> value) by using source <path>/bin/activate in order to use the SDK.
delete
What it does Removes all generated directories and files:
summoner-sdk/(core clone + merged code)- The venv directory (default
venv/, or your--venv <path>) native_build/(cloned native repos)- Any
test_server*.pyortest_server*.jsonfiles
Usage
bash build_sdk.sh delete

# if you used a custom venv path during setup, reuse it here:
bash build_sdk.sh delete --venv .venv
reset
What it does
Shortcut for delete then setup. Cleans out everything and does a fresh bootstrap.
If you originally used --venv <path>, you should also pass it to reset so it removes and recreates the same environment.
Usage
bash build_sdk.sh reset

# reuse your venv path if you set one during setup:
bash build_sdk.sh reset --venv .venv
deps
What it does In the existing venv, reruns the Rust/Python dependency installer:
bash summoner-sdk/reinstall_python_sdk.sh rust_server_v1_0_0 [--uv] [--venv <path>]
Useful if you've updated core or your Rust SDK.
If you originally set up with --uv, you should also run deps with --uv for consistency. If you originally set up with --venv <path>, you should also pass the same --venv <path> so the dependency reinstall targets the correct environment.
Usage
bash build_sdk.sh deps

# reuse your options for consistency:
bash build_sdk.sh deps --uv --venv .venv
test_server
What it does
Runs a small demo server against the SDK installed in venv/. It:
Activates
venv/Copies the core's
desktop_data/default_config.json→test_server_config.jsonGenerates
test_server.py:from summoner.server import SummonerServer from summoner.your_package import hello_summoner if __name__ == "__main__": hello_summoner() SummonerServer(name="test_Server").run(config_path="test_server_config.json")Launches the server
Usage
bash build_sdk.sh test_server
clean
What it does
Removes only the build artifacts and test scripts, preserving venv/:
native_build/- Any
test_*.py,test_*.json, ortest_*.logfiles
Usage
bash build_sdk.sh clean
Example Workflow
# 1. Bootstrap with your real modules
source build_sdk.sh setup

# 2. Develop your native modules under tooling/
#    (edit code, commit, etc.)

# 3. If you want to test against the extension template only:
source build_sdk.sh setup test_build

# 4. Run a quick demo server
bash build_sdk.sh test_server

# 5. Remove native_build/ and test files from test_server
bash build_sdk.sh clean
build.txt & test_build.txt Format
The build.txt and test_build.txt files define which native-package repositories should be included when composing the SDK. Each file lists repository URLs, one per line. Blank lines and lines starting with # are ignored.
You can optionally specify which subfolders within tooling/ to include from each repository.
Basic Format (include all features)
To include all available features from a repository — meaning every folder under its tooling/ directory — just write the repo URL by itself:
# Include all tooling features from these repos
https://github.com/Summoner-Network/extension-utilities.git
https://github.com/Summoner-Network/extension-agentclass.git
For basic smoke testing, your test_build.txt can be minimal:
https://github.com/Summoner-Network/extension-template.git
Filtered Format (include specific folders)
To include only specific subfolders from a repository's tooling/ directory, add a colon : after the URL, followed by the names of the folders you want (one per line):
# Only include feature1 and feature2 from this repo
https://github.com/your-org/your-repo.git:
feature1
feature2
Only the listed subfolders will be copied — any nonexistent folders will be skipped with a warning, but will not cause the build to fail.
Example
# Full repo usage (includes all features)
https://github.com/Summoner-Network/extension-utilities.git

# Filtered usage (only feature_x and feature_y if present)
https://github.com/Summoner-Network/extension-agentclass.git:
aurora
This format gives you fine-grained control over which modules are included in the SDK build, making it easy to tailor your environment to specific use cases or test scenarios.
Related Projects
More Rust projects
All Rust crates →Agent behavior that compiles
An open SDK for agentic payments. Let AI agents make payments, hold funds, and move money across chains with policy enforcement and human approval built in.
x402 payments in Rust: verify, settle, and monitor payments over HTTP 402 flows
Context-aware agentic LLM gateway & router that optimize your agentic workflows with every runs, works with any harnesses, any models, any workflows.
Production-ready x402 facilitator server.
Rust SDK for the x402 payment protocol.